Building Your First Portable Hydroponic System
Getting Started with DIY Portable Hydroponics
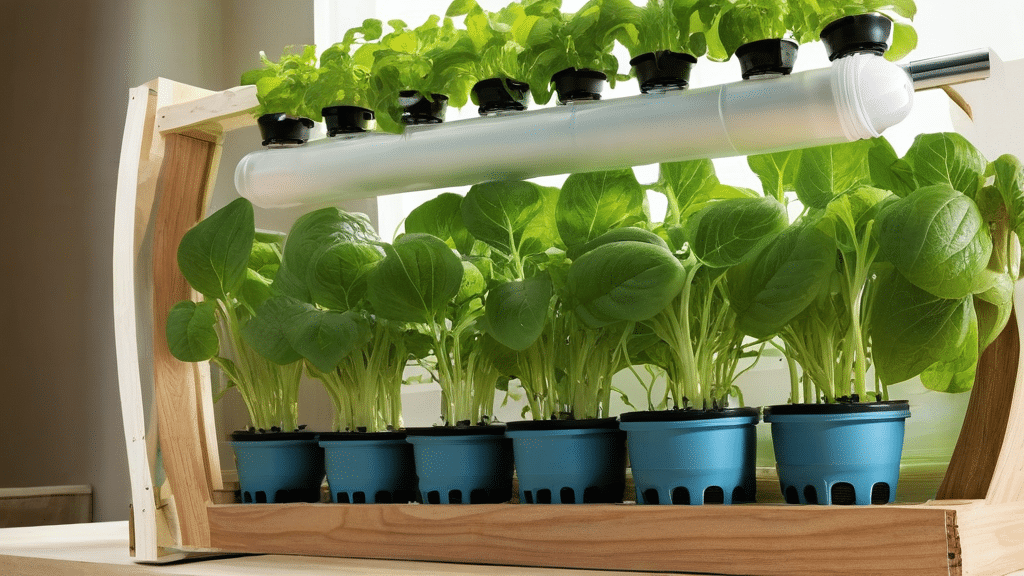
Growing plants without soil might sound like magic, but that’s exactly what hydroponic systems do. The best part? You can build a portable version that moves wherever you need it. Perfect for small spaces, apartments, or anyone who likes to rearrange their living space frequently.
Portable hydroponic systems let you grow fresh herbs, leafy greens, and even small vegetables year-round, regardless of your climate or available outdoor space. They’re efficient too – plants grown hydroponically often grow faster and produce higher yields than their soil-grown counterparts.
What You’ll Need
Before diving in, gather these basic supplies:
- A waterproof container (5-10 gallon plastic tote works well)
- Net pots (small plastic containers with holes)
- Growing medium (rockwool, clay pellets, or coconut coir)
- Air pump with air stone
- Water pump (submersible, small)
- Nutrient solution specifically for hydroponics
- PVC pipes or flexible tubing
- LED grow lights
- pH testing kit
- Wheels or casters (for mobility)
Most of these items can be found at garden centers, hardware stores, or online retailers specializing in hydroponics.
Choosing Your Container
The foundation of your portable system is the container. Look for something sturdy yet lightweight. Dark-colored containers work best since they block light that could promote algae growth. Make sure your container has a lid – you’ll cut holes in this for your plants.
For true portability, attach wheels to the bottom of your container. Small casters from a hardware store work perfectly. Mount them to a flat board first, then secure the container to this wheeled platform.
Setting Up the Water System
Hydroponics is all about water circulation. You’ll need to create a system where nutrient-rich water reaches your plants’ roots.
For a basic setup:
- Drill holes in the container lid sized to fit your net pots
- Install the submersible pump in the bottom of your container
- Connect tubing to the pump that can deliver water near each plant
- Add the air stone connected to the air pump to oxygenate the water
The water level should be high enough to submerge the pump but low enough that only the bottom of your net pots touches it. This allows roots to grow down into the nutrient solution while keeping the growing medium slightly damp.
Selecting Plants for Your System
Not all plants thrive equally in portable hydroponic systems. Beginners should start with:
- Lettuce and leafy greens (spinach, kale)
- Herbs (basil, mint, cilantro, parsley)
- Strawberries
- Small peppers
These plants have relatively shallow root systems and don’t grow too tall, making them perfect for portable setups.
Lighting Solutions
Unless your system will live exclusively outdoors or near a very sunny window, you’ll need grow lights. LED lights are ideal because they:
- Use less electricity than other options
- Generate less heat (important for a compact system)
- Can be positioned close to plants without burning them
- Come in full-spectrum options that mimic natural sunlight
Mount your lights on adjustable supports so you can raise them as plants grow. For a truly portable setup, consider a light stand that attaches directly to your container.
Maintaining Your Portable Garden
Once your system is running, regular maintenance keeps it productive:
Check water levels every 2-3 days. Hydroponics uses less water than soil gardening, but evaporation still occurs.
Test pH weekly and adjust to keep between 5.5-6.5, which is ideal for most plants. Simple pH up/down solutions make this easy.
Change the nutrient solution completely every 2-3 weeks to prevent salt buildup and ensure proper nutrition.
Keep an eye on water temperature. Ideal range is 65-75°F (18-24°C). Extreme temperatures stress plants and can lead to disease.
Troubleshooting Common Issues
If leaves yellow, check nutrient strength – you might be over or under-feeding your plants.
Wilting despite adequate water often indicates oxygen deficiency. Make sure your air stone is working properly.
White, fuzzy roots are healthy. Brown, slimy roots indicate root rot – increase oxygen and consider hydrogen peroxide treatment.
Algae growth means too much light is reaching your nutrient solution. Cover exposed areas with reflective material.
Taking Your System to the Next Level
Once you’re comfortable with the basics, consider adding:
Automatic timers for lights and pumps to reduce manual monitoring.
A simple drainage system for easier nutrient solution changes.
A nutrient dosing system with separate reservoirs for precise feeding.
The beauty of building your own portable hydroponic system is that you can start simple and expand as your interest and experience grow. Not only will you enjoy fresh, homegrown produce, but you’ll also have the satisfaction of creating a sustainable garden that can follow you anywhere.
Materials and Assembly Tips for DIY Hydroponic Setups
Essential Materials for Your DIY Hydroponic System
Building your own hydroponic setup doesn’t have to be complicated or expensive. With the right materials and some simple assembly tips, you can create a thriving garden without soil. The beauty of DIY hydroponics is that you can customize the size and style to fit your space, whether it’s a small apartment or a spacious backyard.
Container Options
Your choice of containers forms the foundation of your hydroponic system. Look for these qualities when selecting containers:
- Food-grade plastic to prevent chemical leaching
- Opaque or covered containers to prevent algae growth
- Appropriate depth for your chosen plants’ root systems
- Durable materials that won’t break down when exposed to water and nutrients
Popular container choices include 5-gallon buckets, plastic storage totes, and PVC pipes. Many gardeners repurpose items like plastic drink bottles or milk jugs for smaller setups. Remember that darker containers work better as they block light that promotes algae growth in your nutrient solution.
Growing Media Choices
Unlike traditional gardening, hydroponics relies on growing media rather than soil to support plant roots. Each medium has unique properties:
- Rockwool – Excellent water retention but requires pH adjustment before use
- Expanded clay pellets (LECA) – Reusable, provides good aeration, and stays pH neutral
- Coconut coir – Environmentally friendly with good water retention qualities
- Perlite – Lightweight with excellent drainage, often mixed with other media
For beginners, a mix of coconut coir and perlite offers a good balance of water retention and aeration. This combination helps prevent root rot while ensuring your plants have access to the nutrient solution they need.
Essential Components for Hydroponic Systems
Beyond containers and growing media, you’ll need several key components to create a functioning hydroponic garden.
Irrigation and Plumbing Materials
Water delivery is crucial for hydroponics success. Gather these items:
- 1/2-inch or 3/4-inch tubing for main water lines
- Smaller diameter tubing for individual plant delivery
- Connectors, elbows, and T-joints for creating your water network
- Drip emitters or spray nozzles for even water distribution
- Bulkhead fittings for secure connections through container walls
When purchasing tubing, get extra length to accommodate changes in your design. Food-grade vinyl tubing works well and can be found at most hardware stores at reasonable prices.
Lighting Requirements
Without proper lighting, your hydroponic plants won’t thrive. For indoor setups, you’ll need:
- Full-spectrum LED grow lights for energy efficiency
- Light hangers with adjustable height
- Timer to automate light cycles
- Reflective material to maximize light usage
The ideal lighting depends on your plants’ needs. Leafy greens require about 14-16 hours of light daily, while fruiting plants like tomatoes need more intense light for 16-18 hours per day.
Assembly Tips for Successful Hydroponic Gardens
With materials gathered, follow these assembly tips to create a reliable system:
Creating Watertight Connections
Leaks can damage your home and waste nutrients. Ensure watertight connections by:
- Using Teflon tape on threaded connections
- Applying food-grade silicone sealant around bulkhead fittings
- Testing all connections with plain water before adding nutrients
- Using rubber gaskets where appropriate
After assembly, run your system with clean water for 24 hours to check for leaks before adding plants or nutrients.
Setting Up Your Nutrient Delivery System
Plants need consistent access to nutrients. Set up your delivery system following these guidelines:
- Position pumps below the water line to prevent burnout
- Install filters to prevent clogging in tubes and emitters
- Create gentle water flow to avoid damaging delicate roots
- Ensure each plant receives equal access to nutrients
For ebb and flow or deep water culture systems, check that water cycles work properly before adding plants. The timing should allow roots access to nutrients without becoming waterlogged.
Money-Saving DIY Solutions
Save money on your hydroponic setup with these creative alternatives:
- Use pool noodles as net pot holders by cutting circular holes
- Repurpose plastic food containers as seed-starting chambers
- Create your own net pots from plastic cups with holes drilled in the bottom
- Build a reservoir from a plastic storage bin rather than buying commercial options
Many gardeners find that upgrading their system gradually works best. Start simple with a basic deep water culture setup using buckets, then expand as you gain confidence and experience.
Remember to test your complete system before adding plants. This allows you to troubleshoot issues with water flow, leaks, or electrical components without risking your seedlings. With quality materials and careful assembly, your DIY hydroponic system will provide fresh produce year-round with minimal maintenance.
Conclusion
The Path to Hydroponic Success Starts with Your First System
Building your own portable hydroponic system opens up a world of growing possibilities that fit your lifestyle and space constraints. The journey from gathering simple materials like plastic containers, PVC pipes, and nutrient solutions to harvesting your first homegrown lettuce or herbs is incredibly rewarding.
Remember that your first system doesn’t need to be perfect. Start small, learn from each growing cycle, and expand your setup as your confidence grows. The beauty of portable hydroponics lies in its flexibility—you can adjust, reconfigure, and optimize your system based on what works for your specific plants and environment.
When selecting materials, prioritize food-grade plastics, reliable pumps, and quality growing media to set a solid foundation. Your DIY approach saves money while giving you complete control over the design that suits your needs, whether it’s a window-sill NFT system or a rolling bucket deep water culture setup.
As you become more comfortable with hydroponic growing, you’ll develop an intuitive understanding of plant needs, water quality, and nutrient balances. This knowledge transfers across all types of gardening, making you a more skilled grower overall.
Take pride in your portable hydroponic system—it represents self-sufficiency, innovation, and a commitment to growing fresh food in an efficient, space-saving way. Whether you’re growing in an apartment, dorm room, or small patio, you’ve taken an important step toward sustainable, year-round gardening.
Happy growing!