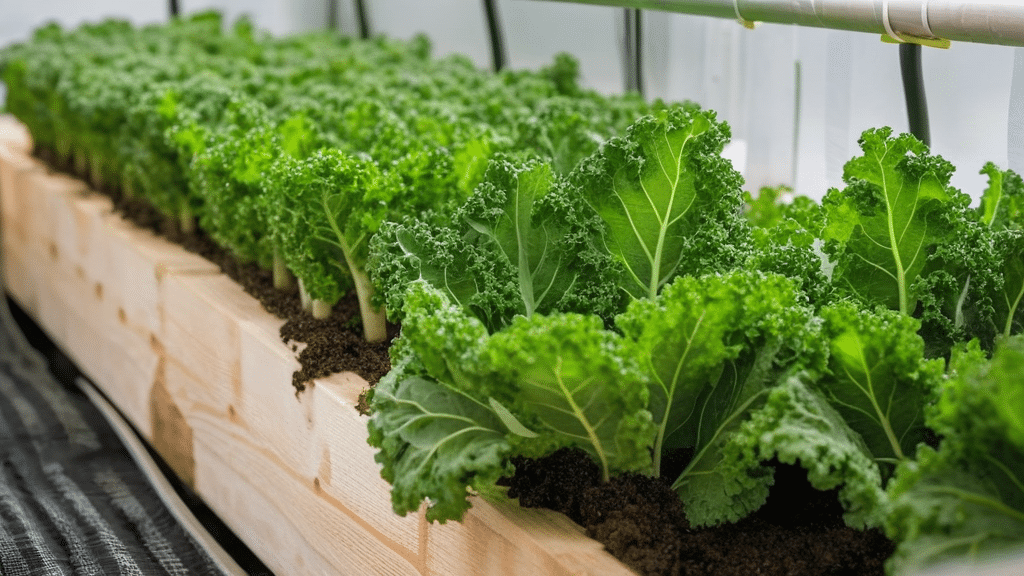
Essential Steps to Start Growing Kale in Your Hydroponic System
Hydroponic kale cultivation has surfaced as a revolutionary technique for growing this nutrient-dense leafy green. By mastering the essentials of hydroponic kale production, you can savor fresh, crisp leaves throughout the year (regardless of outdoor growing conditions). However, before embarking on your journey into kale cultivation, it is imperative to establish an appropriate hydroponic system. Deep Water Culture (DWC) and Nutrient Film Technique (NFT) are systems that work exceptionally well for growing kale. Your setup should encompass various components, because this will ensure optimal growth and health of the plants.
• Growing containers or channels
• Air pump and air stones for oxygenation
• Nutrient solution reservoir
• pH monitoring equipment
The growing medium—such as rockwool or clay pellets—plays a crucial role in plant cultivation. This is because the choice of medium can significantly impact root development and nutrient absorption. However, one must consider the specific needs of the plants being cultivated, as different mediums offer varying benefits. Although both rockwool and clay pellets are popular options, they serve distinct purposes; for instance, rockwool retains moisture effectively, whereas clay pellets promote better drainage. Thus, understanding the characteristics of each medium becomes essential for successful gardening.
• LED grow lights for indoor setups
Establishing an Ideal Cultivation Atmosphere
Kale flourishes under particular environmental parameters in your hydroponic system: temperatures must be maintained at (65-75°F or 18-24°C) for maximal growth. Relative humidity, however, should remain within the range of 50-65%, because this helps to avert fungal complications while fostering robust leaf development. Although these conditions are critical, they are not the only factors that influence kale’s success.
Light Requirements
To ensure optimal growth, your hydroponic kale requires approximately 14-16 hours of light each day (this is essential). When utilizing artificial lighting, it is advisable to place LED grow lights at a distance of 12-18 inches above the plants. Blue spectrum lights, because they encourage leafy growth, are particularly beneficial; however, one must be mindful of not positioning the lights too close, as this could cause damage. Although the lighting is vital, other factors also play a role in successful kale production.
Nutrient Solution Management
Kale necessitates a well-balanced nutrient solution that is abundant in nitrogen to promote vigorous leaf growth. It is essential to uphold these critical parameters (however, this may vary):
• pH levels between 5.5-6.5
The Electrical Conductivity (EC) typically ranges from 1.6 to 2.2; however, variations can occur. This range is significant because it influences various chemical processes. Although most readings fall within this spectrum, there are instances where values may exceed these limits. But it is essential to monitor these fluctuations closely.
• Nitrogen-rich nutrient solution
• Regular solution changes every 2-3 weeks
• Daily monitoring of nutrient levels
Germination and Transplanting
Initiate the germination of kale seeds within rockwool cubes that have been saturated in pH-balanced water. It is crucial to maintain a temperature of approximately 70°F (21°C) throughout this process. However, once the seedlings exhibit 2-3 true leaves—usually emerging after a span of 7-10 days—you should consider transplanting them into your hydroponic system. This transition is vital for their continued growth and development, although it requires careful handling.
Ongoing Care and Maintenance
Successful hydroponic kale production necessitates (1) consistent attention to plant health and system maintenance. You should check plants daily for signs of nutrient deficiencies or pest problems. Pruning yellowing leaves promptly is crucial (because it helps) to prevent disease spread and maintain proper air circulation between plants. However, neglecting these tasks can lead to significant issues; this is why diligence is essential. Although it may seem tedious, regular monitoring ensures optimal growth and vitality.
Spacing and Support
Space kale plants (about) 8 to 12 inches apart to ensure adequate leaf development. As the plants grow larger, you may find that support is necessary; this prevents stems from bending under the weight of mature leaves. Simple stakes or trellis systems can work effectively. However, you should monitor the plants closely, because they may require adjustments as they continue to thrive. Although it seems straightforward, proper spacing and support are crucial for optimal growth.
Harvesting Your Hydroponic Kale
Commence the harvesting of outer leaves when they attain a length of 6 to 8 inches (which usually occurs 30 to 40 days post-transplanting). Employ clean scissors or pruning shears to sever the leaves at their base, ensuring that the central growth point remains undisturbed. This method—often referred to as “cut-and-come-again”—facilitates continuous harvesting (for several months). However, one must be cautious during the process because improper cutting can damage the plant. Although the method is simple, it requires attention to detail to maximize yield.
Common Challenges and Solutions
Be vigilant for these possible complications in your hydroponic kale (1): leaf yellowing is often indicative of nitrogen deficiency; stunted growth may signal the need to check pH levels and nutrient concentration. Moreover, wilting leaves could suggest inadequate oxygenation and water flow, while pest infestations necessitate regular monitoring and the use of suitable biological controls. Additionally, tip burn might arise from imbalanced calcium levels or unsuitable environmental conditions.
However, with diligent system maintenance and close attention to growing conditions, this hydroponic kale can yield plentiful harvests of nutritious leaves. Regularly assessing nutrient levels, maintaining optimal environmental conditions and addressing any issues promptly will help ensure successful cultivation. Although each harvest cycle presents an opportunity for valuable experience, it also allows you to refine your growing techniques, ultimately leading to improved results in future crops.
Optimal Growing Conditions and Maintenance for Hydroponic Kale Success
Establishing Your Hydroponic System for Kale
Growing kale through hydroponics provides an opportunity for year-round access to fresh greens, which are known for their outstanding nutrient profile. However, the foundation of your success lies in selecting the appropriate system configuration. Deep Water Culture (DWC) and Nutrient Film Technique (NFT) systems are particularly effective for cultivating kale. In a DWC arrangement, you should suspend your plants within net pots that are filled with clay pellets, allowing the roots to dangle directly into the nutrient-rich water positioned below.
It is essential to maintain the water temperature within the range of 65-70°F (18-21°C) to mitigate root complications and enhance nutrient absorption. Moreover, your growing environment ought to remain between 60-75°F (15-24°C) during daylight hours, while it can be slightly cooler at night. Although high temperatures can induce premature bolting in your kale, ultimately detracting from leaf quality and flavor, this can be managed with careful monitoring.
Light and pH Requirements
Kale flourishes when subjected to appropriate lighting conditions. It is recommended to provide 14-16 hours of light each day, utilizing full-spectrum LED grow lights that should be positioned 12-18 inches above the plant foliage. However, it is crucial to monitor the intensity of the light to prevent leaf burn, while also ensuring sufficient photosynthesis. Your kale requires approximately 25-50 watts per square foot of growing area.
The pH levels play a significant role in nutrient availability. Therefore, maintain your nutrient solution within a pH range of 5.5-6.5, checking the levels on a daily basis. Although sudden fluctuations in pH can induce stress in the plants, limiting their capacity to absorb essential nutrients, using a high-quality pH meter and regularly calibrating it will yield accurate readings. This attention to detail can greatly enhance your kale’s growth potential.
Nutrient Management Strategies
Your kale necessitates precise nutrient concentrations to achieve optimal growth. Commence with an EC (electrical conductivity) level ranging from 1.2 to 1.8 for seedlings; however, this should be gradually elevated to between 2.0 and 2.4 for fully mature plants. Essential nutrients comprise (but are not limited to):
- Calcium for cell wall strength
- Potassium for overall plant health
Nitrogen plays a crucial role in leaf development and contributes significantly to the vibrant green color of plants. However, its availability can be limited in certain environments. This limitation can affect overall plant health. Although nitrogen is essential, it must be present in the right quantities; too much nitrogen can lead to other issues. Because of these factors, ensuring an adequate supply of nitrogen is vital for optimal growth.
Magnesium plays a crucial role in the production of chlorophyll (the green pigment found in plants). This element is essential, however, its significance is often overlooked. Chlorophyll, which is vital for photosynthesis, relies on magnesium to function effectively. Because of this, the absence of magnesium can severely impact plant health. Although many may not realize it, understanding the importance of magnesium in chlorophyll production is key to fostering healthy plant growth.
Change your nutrient solution entirely every 7 to 10 days; (this) is essential for optimal plant health. Maintaining adequate oxygen levels is crucial, whether through air stones or circulation pumps. However, you should also monitor your plants closely for signs of nutrient deficiencies. Yellowing leaves or stunted growth are indicators that something may be amiss, (although) these symptoms can also arise for other reasons.
Plant Spacing and Training
Proper spacing prevents competition and promotes healthy growth; however, it is essential to allow 12-18 inches between kale plants in your hydroponic system (this spacing enables not only adequate air circulation but also light penetration). Remove older, yellowing leaves regularly, because this helps maintain plant health and prevents disease spread.
Train your kale plants by removing lower leaves as they grow. Although this practice focuses energy on new growth, it also improves air circulation and reduces humidity around the plant base (thus preventing potential fungal issues).
Common Challenges and Solutions
Observe for prevalent issues such as aphids (1) or powdery mildew. It is crucial to maintain adequate humidity levels (ranging from 50-60%) and ensure sufficient air circulation; this can help prevent these problems. If pests manifest, consider employing organic solutions such as neem oil, or perhaps introduce beneficial insects (like ladybugs).
Tip burn, which presents itself as brown edges on leaves, frequently indicates a calcium deficiency or unsuitable environmental conditions. To address this, one must adjust nutrient levels because proper air movement around plants is essential. However, neglecting these factors can exacerbate the situation.
Harvesting Your Hydroponic Kale
Initiate the harvesting process when the leaves attain a length of 6 to 8 inches, which generally occurs 4 to 6 weeks following transplanting. Employ clean scissors to sever the outer leaves at their base; this allows the inner leaves to persist in their growth. This “cut-and-come-again” technique guarantees a continuous yield from your plants.
It is important to remember that harvesting should ideally take place in the morning, when the leaves are at their most turgid and replete with nutrients. Upon harvesting, kale should be promptly stored under cool conditions to preserve its freshness and nutritional value. With adequate care and maintenance, your hydroponic kale plants can yield fresh, nutritious leaves over the course of several months.
Conclusion
Cultivating kale through hydroponics provides an effective and gratifying method for producing this nutrient-dense leafy green throughout the year. By adhering to key procedures—such as selecting the appropriate system, maintaining adequate nutrient levels and closely monitoring environmental conditions—you can achieve bountiful harvests directly from your domicile. The success of your hydroponic kale is contingent upon sustaining consistent temperatures (ideally between 65-75°F), regulating pH levels (which should remain within 5.5-6.5) and ensuring that proper lighting is provided for 14-16 hours each day.
It is important to note that, although establishing your hydroponic system may necessitate an upfront investment and a degree of learning, the long-term advantages render it a worthy endeavor. Your commitment will be compensated by accelerated growth rates, larger yields and cleaner produce in comparison to conventional soil gardening. Furthermore, you will experience the fulfillment of cultivating fresh, pesticide-free kale regardless of seasonal changes or external weather conditions.
As you accumulate experience in the realm of hydroponic kale cultivation, you will enhance your comprehension of your plants’ requirements, thus enabling you to fine-tune your system more effectively. Whether you are a novice or a seasoned hydroponic gardener, growing kale through this contemporary agricultural method offers an exceptional chance to establish a connection with your food source. However, it also allows you to reap the benefits of sustainable and space-efficient gardening practices.
Begin by starting small; (this) approach will help you maintain consistency in your maintenance regimen. Although it might be intimidating, do not hesitate to modify your strategy based on your plants’ reactions. With diligent care and attention, you will soon find yourself harvesting fresh, crispy kale leaves directly from your hydroponic garden, which is a rewarding endeavor.