DIY Indoor Hydroponic Systems: Getting Started with Soil-Free Gardening
Starting Your Indoor Hydroponic Garden
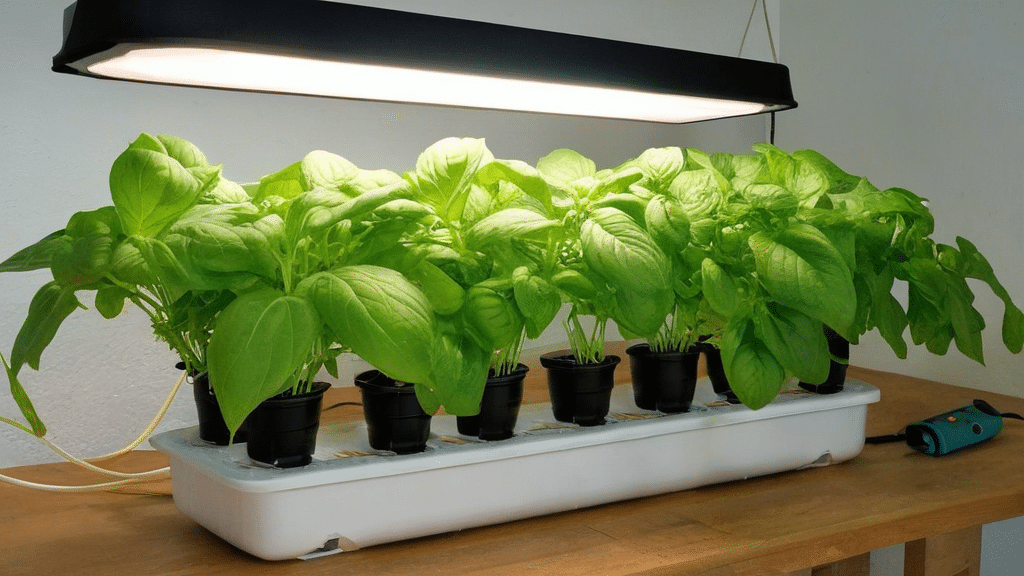
Growing plants without soil might sound like magic, but it’s actually simple science! DIY indoor hydroponic systems let you grow fresh herbs, veggies, and flowers year-round, no matter where you live. These soil-free setups use nutrient-rich water to feed plants directly, helping them grow faster and often bigger than in regular soil.
If you’re new to hydroponics, don’t worry. Building your first system doesn’t need to be complicated or expensive. With some basic materials and a bit of guidance, you’ll be growing fresh produce in no time.
Why Try Indoor Hydroponics?
Before jumping into building your system, let’s look at why so many people love growing plants this way:
- Plants grow up to 50% faster than in soil
- Uses up to 90% less water than traditional gardening
- No weeding or soil-borne pests to worry about
- Perfect for small spaces like apartments
- Fresh produce year-round regardless of weather
- Fewer chemicals needed compared to store-bought produce
The best part? You control exactly what goes into your food, and you can’t get fresher than harvesting right before eating!
Choose Your DIY Hydroponic System
For beginners, these three systems offer the easiest start:
Deep Water Culture (DWC)
The simplest hydroponic system uses a floating platform where plants sit with their roots dangling in nutrient water. An air pump keeps the water oxygen-rich.
What you’ll need:
- Container with lid (5-gallon bucket works great)
- Net pots
- Growing medium (like clay pellets)
- Air pump with stone
- Nutrient solution
Wick System
This passive system uses no electricity! Wicks draw nutrient solution up to the plants from a reservoir below.
What you’ll need:
- Two containers (one for plants, one for nutrients)
- Wicking material (cotton rope or felt)
- Growing medium (coconut coir works well)
- Nutrient solution
Kratky Method
The ultimate beginner method requires no electricity or pumps – just set it up and let it grow!
What you’ll need:
- Mason jar or container
- Net pot or cup
- Growing medium
- Nutrient solution
Gathering Your Basic Supplies
Most hydroponic supplies can be found at hardware stores, garden centers, or online:
- Containers: Food-grade plastic tubs, buckets, or even plastic bottles
- Growing medium: Clay pellets, rockwool cubes, or coconut coir
- Seeds or seedlings: Lettuce, herbs, and greens work best for beginners
- Hydroponic nutrients: Look for complete solutions with micro and macronutrients
- pH testing kit: Plants need specific pH levels (usually 5.5-6.5) to absorb nutrients
- Light source: South-facing window or affordable LED grow lights
Building Your First System: DWC Bucket
Let’s walk through creating a simple Deep Water Culture system:
- Drill a hole in the bucket lid sized for your net pot
- Insert the net pot into the hole
- Connect the air pump to the air stone with tubing
- Place the air stone at the bottom of the bucket
- Fill the bucket with water, leaving 1 inch of space at the top
- Add nutrients according to package directions
- Test and adjust pH using your test kit
- Place growing medium in the net pot
- Add your seedling, ensuring roots reach the water
- Turn on the air pump
Your plants’ roots will grow down into the water while the air stone bubbles oxygen to prevent them from drowning. Keep the water level topped up so it touches the bottom of the net pot.
Plant Care and Maintenance
Even the simplest hydroponic system needs some care:
Daily Checks
- Water level (top off with plain water, not nutrient solution)
- Plant appearance (any discoloration or wilting?)
- Equipment function (is the air pump running?)
Weekly Tasks
- Test and adjust pH
- Check nutrient strength with a TDS meter if possible
- Look for any pest issues
- Prune plants as needed
Monthly Tasks
- Complete water and nutrient change
- Clean any salt buildup on containers
- Check for and clean any algae growth
Common Beginner Mistakes to Avoid
Save yourself some headaches by watching out for these issues:
- Using too much nutrient solution (less is often better)
- Forgetting to check pH regularly
- Placing systems where temperature fluctuates greatly
- Not providing enough light (most vegetables need 14-16 hours daily)
- Starting with difficult plants (try lettuce or basil before tomatoes)
Perfect Plants for Your First System
Some plants are much easier to grow hydroponically than others:
- Lettuce and leafy greens (ready in just 30 days!)
- Herbs like basil, mint, and cilantro
- Spinach and kale
- Strawberries
- Swiss chard
Once you master these easier plants, you can move on to more challenging crops like tomatoes, cucumbers, and peppers.
With these basics, you’re ready to start your soil-free growing adventure. Hydroponic gardening lets you connect with your food in a whole new way while enjoying the satisfaction of building something with your own hands.
Essential Components and Setup Guide for Beginner Hydroponic Gardens
Getting Started With Indoor Hydroponic Gardens
Growing your own plants without soil might sound like magic, but that’s exactly what hydroponics lets you do! If you’ve been curious about starting an indoor garden without the mess of soil, DIY hydroponic systems are perfect for beginners. These setups let plants grow in nutrient-rich water instead of dirt, often leading to faster growth and bigger harvests.
The best part? You don’t need fancy equipment or a green thumb to get started. With some basic items from your local hardware store or even recycled materials from around your home, you can build a simple hydroponic system this weekend.
Basic Components You’ll Need
Every hydroponic system, no matter how simple or complex, needs these key parts:
- Growing containers: These hold your plants and nutrient solution. Plastic buckets, storage bins, or even old food containers work great.
- Growing medium: Instead of soil, you’ll use materials like perlite, coconut coir, or clay pellets to support your plants’ roots.
- Nutrient solution: Plants need specially formulated nutrients dissolved in water. Pre-mixed hydroponic nutrients are available at garden centers.
- Light source: Indoor plants need light to grow. A sunny window might work for some plants, but most indoor hydroponic gardens need grow lights.
- Water pump: Some systems need a small pump to move water around (though not all do).
- Air pump and air stone: These add oxygen to your water, keeping roots healthy.
Choosing Your First Hydroponic System
For beginners, three systems stand out for their simplicity and effectiveness:
Deep Water Culture (DWC)
The simplest hydroponic system to build yourself! In a DWC system, plant roots hang directly in nutrient-rich water that’s constantly bubbling with oxygen.
To build a basic DWC:
- Get a dark-colored container (like a 5-gallon bucket)
- Cut holes in the lid for net pots
- Add an air pump and air stone inside
- Fill with nutrient solution
- Place plants in net pots with growing medium
- Let roots grow down into the water
This system costs about $30-50 to build and works great for leafy greens and herbs.
Wick System
Even simpler than DWC, wick systems have no moving parts! They use wicks (like cotton rope) to draw nutrient solution up to the plants.
To make one:
- Get two containers – one for plants and one for nutrients
- Place the plant container above the nutrient container
- Run wicks from the bottom of the plant container into the nutrient solution
- Fill the top container with growing medium
- Plant your seeds or seedlings
This system is perfect for small herbs and is virtually maintenance-free.
Kratky Method
The Kratky method is like a simplified DWC without the air pump. It’s the ultimate no-fuss system!
To create one:
- Fill a container with nutrient solution
- Place plants in net pots in holes on the lid
- Leave air space between the water and the bottom of the lid
- As plants drink, the water level drops, creating more air space for roots
This method works well for smaller plants and requires almost no maintenance – perfect for busy beginners.
Setting Up Your First System
Once you’ve chosen your system type, follow these steps:
Find a good location: Look for a spot with access to electricity (for lights and pumps), relatively stable temperatures (65-75°F is ideal), and no direct sunlight that could overheat your system.
Assemble your components: Build your chosen system following the basic layouts described above.
Prepare your nutrient solution: Mix hydroponic nutrients with water according to package directions. Start with half-strength for seedlings.
Add plants: For beginners, start with fast-growing, easy plants like lettuce, spinach, basil, or mint.
Monitor daily: Check water levels and make sure pumps are working properly. Look for any signs of problems with your plants.
Troubleshooting Common Issues
Even the simplest systems can have problems. Here’s how to fix the most common ones:
- Yellowing leaves: Usually means nutrient deficiency. Try refreshing your nutrient solution.
- Drooping plants: Check water levels and make sure oxygen is reaching the roots.
- Algae growth: Use opaque containers and cover any exposed water to block light.
- Root rot: Shows up as brown, slimy roots. Increase oxygen to the water and consider adding hydrogen peroxide.
Remember, starting small is key to success with DIY hydroponics. A simple system with just a few plants gives you room to learn and experiment before scaling up. With these basics in place, you’ll be growing fresh herbs and vegetables year-round, regardless of outdoor weather or garden space!
Conclusion
Growing Beyond Soil: Your Hydroponic Journey Begins
Starting your indoor hydroponic garden opens up a world of year-round growing possibilities right in your home. With just basic materials like containers, growing medium, nutrients, and a simple water system, you can create a thriving garden that produces fresh herbs, leafy greens, and even small vegetables regardless of weather or outdoor space limitations.
Remember that successful hydroponic gardening doesn’t require expensive equipment or technical expertise. A simple water bottle system or bucket garden can yield impressive results while you learn the basics. As your confidence grows, you can expand to more advanced setups like deep water culture or nutrient film technique systems.
The key to hydroponic success lies in maintaining the right balance of nutrients, pH levels, and light for your plants. Start with easy-growing options like lettuce, basil, or spinach to build your confidence before tackling more demanding plants.
Don’t be discouraged by early challenges—each adjustment teaches you valuable lessons about how plants grow in soil-free environments. Take notes, make improvements, and watch as your DIY system evolves.
Your indoor hydroponic garden isn’t just about growing food—it’s about connecting with plants in a new way, understanding their needs, and experiencing the satisfaction of creating a sustainable growing system. As your plants thrive under your care, you’ll discover that hydroponics offers not just fresh produce but a rewarding hobby that can expand with your interest and expertise.
Happy growing!