Building Your First Hydroponic Window Farm
Starting Your Indoor Hydroponic Garden
Have you ever wished for fresh herbs and veggies year-round without a garden? You can grow plants right on your windowsill using water instead of soil! This method, called hydroponics, lets you grow food in small spaces like apartments.
A window farm uses vertical space efficiently. You’ll hang containers in your window where plants get natural light. The water and nutrients flow from top to bottom, feeding each plant along the way.
Making your own hydroponic window system is easier than you might think. You’ll need some basic supplies and a few hours to set everything up. Once running, your system needs just minutes of attention each week.
Gathering Your Supplies
Before starting your project, collect these materials:
- Plastic bottles (1-2 liter size)
- Sharp scissors or craft knife
- Small aquarium pump
- Air tubing
- Zip ties
- String or thin rope
- Plant cups or net pots
- Growing medium (clay pellets or rockwool)
- Hydroponic nutrients
- Seedlings or seeds
- Small timer for the pump
Most items can be found at hardware stores, garden centers, or online shops specializing in hydroponics. The total cost runs about $50-100 depending on how many plants you want to grow.
Setting Up Your Window Farm System
Creating your hydroponic system involves a few key steps:
First, prepare your bottles by cutting them horizontally about one-third from the bottom. The top part becomes an upside-down planter, while the bottom serves as a water reservoir.
Next, make a hole in each bottle cap large enough for the tubing to pass through. This allows water to flow from one bottle to the next.
Arrange your bottles vertically, with the top part of each bottle inserted upside-down into the bottom section of another. This creates a connected system where water can flow downward through all containers.
Run tubing from your pump at the bottom reservoir up to the top bottle. The pump will push water up, and gravity will help it flow back down through each plant container.
Secure everything with zip ties and string, making sure the system hangs securely in your window. Test the water flow before adding plants to catch any leaks.
Choosing Plants for Your Window Farm
Not all plants work well in hydroponic systems. For beginners, these options grow successfully:
- Leafy greens (lettuce, spinach, kale)
- Herbs (basil, mint, oregano, cilantro)
- Strawberries
- Cherry tomatoes (compact varieties)
- Peppers (smaller varieties)
Consider your window’s exposure when choosing plants. South-facing windows provide the most light, while north-facing windows offer the least. East and west windows fall somewhere in between.
For windows with less light, stick with herbs and leafy greens. Plants that produce fruit need more sunlight to develop properly.
Maintaining Your Hydroponic Garden
Once your system is running, you’ll need to:
Check water levels every few days and top off as needed. The water will gradually decrease due to plant uptake and evaporation.
Change the nutrient solution completely every 2-3 weeks. Old solution can develop imbalances that harm plants.
Test pH levels weekly using an inexpensive test kit. Most hydroponic plants prefer a slightly acidic environment between 5.5-6.5 pH.
Inspect for pests regularly. While hydroponic systems have fewer pest problems than soil gardens, they can still attract aphids and other insects.
Trim plants as needed to prevent overcrowding. Good air circulation helps prevent mold and disease.
Troubleshooting Common Issues
If leaves turn yellow, you might have a nutrient deficiency or pH imbalance. Check your nutrient solution and adjust as needed.
Slow growth often indicates insufficient light. Consider adding a small grow light if your window doesn’t provide enough natural sunlight.
Algae growth in water or tubing means too much light is reaching your water. Cover reservoirs with dark material to block light.
If your pump stops working, replace it quickly. Plants can suffer damage within 24 hours without water circulation.
Root rot appears as brown, slimy roots and results from poor oxygenation. Make sure your pump provides enough air to the water.
With regular attention, your window farm will provide fresh produce for months. The satisfaction of harvesting food you’ve grown yourself makes the effort worthwhile. Plus, you’ll enjoy the beauty of green, growing things brightening your window all year long.
Essential Components and Maintenance for Window Hydroponics
Understanding Window Hydroponics Systems
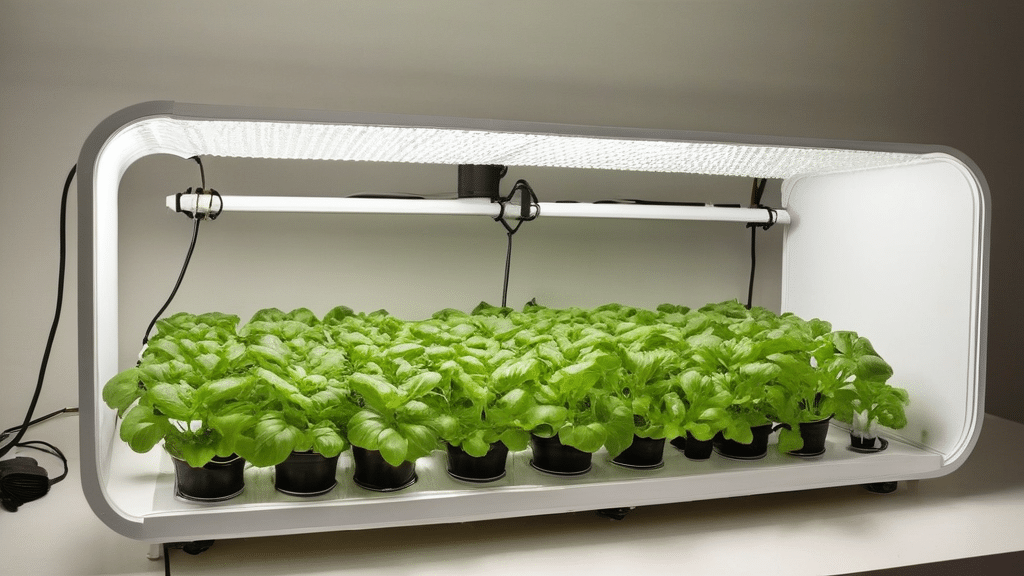
Setting up a window hydroponic farm can transform your home into a year-round garden oasis. These space-saving systems use water instead of soil to grow plants, making them perfect for city living. Your windowsill becomes a mini farm that needs specific parts to work well.
The heart of any window hydroponic setup is the water reservoir. This container holds the nutrient solution that feeds your plants. Choose containers made from food-grade plastic or glass that block light to prevent algae growth. Dark-colored containers work best for this purpose.
Growing containers or net pots hold your plants in place while allowing roots to access the nutrient solution. These usually come with holes or mesh bottoms that let roots grow through. You can use small plastic cups with holes punched in them if you’re on a budget.
Essential Growing Mediums for Window Hydroponics
Plants need support even without soil, which is why growing mediums are crucial. These materials anchor your plants while allowing water and oxygen to reach the roots.
Expanded clay pellets (LECA) work wonderfully for window systems. They’re lightweight, reusable, and provide excellent drainage and aeration. Rinse them thoroughly before first use to remove dust.
Rockwool cubes offer another popular option. Made from spun rock fibers, they hold water well while maintaining air pockets for roots. However, they’re not biodegradable, so consider environmental impact.
Coconut coir, made from coconut husks, provides an eco-friendly alternative. It retains moisture excellently while being sustainable and biodegradable. It’s perfect for seedlings and smaller plants in your window farm.
Nutrient Solutions and Water Quality
Plants need more than just water to thrive in hydroponic systems. Nutrient solutions provide essential elements that plants would normally get from soil.
Pre-mixed nutrient solutions take the guesswork out of feeding your plants. Look for formulations specifically designed for the types of plants you’re growing. Leafy greens need different nutrients than flowering or fruiting plants.
Water quality significantly impacts your hydroponic success. Tap water often contains chlorine and minerals that can harm plants or alter nutrient availability. Let tap water sit for 24 hours before using it to allow chlorine to evaporate, or consider using filtered water.
Regularly check the pH level of your nutrient solution using test strips or a digital meter. Most plants thrive when the pH stays between 5.5 and 6.5. Adjust as needed with pH up or down solutions available at garden stores.
Lighting Considerations for Window Hydroponics
While window farms benefit from natural sunlight, understanding light needs ensures thriving plants. South-facing windows provide the most intense light in the Northern Hemisphere, perfect for sun-loving plants like herbs and small vegetables.
East and west windows offer moderate light suitable for leafy greens and many herbs. North-facing windows provide the least light and work best for shade-tolerant plants or should be supplemented with grow lights.
During winter months or in apartments with limited natural light, small LED grow lights can make a huge difference. These energy-efficient lights come in strips or panels that can attach above your window farm. Choose full-spectrum LEDs to provide the complete light range plants need.
Maintenance Routines for Healthy Plants
Regular maintenance keeps your window farm thriving. Check water levels every few days, as hydroponic systems can dry out quickly, especially in sunny windows. Top off with plain water rather than nutrient solution when just replacing evaporated water.
Change the nutrient solution completely every 2-3 weeks to prevent salt buildup and provide fresh nutrients. This is also a good time to clean any parts showing algae growth.
Monitor your plants for signs of nutrient deficiencies or excesses. Yellow leaves often indicate nitrogen deficiency, while burned leaf tips might signal nutrient concentration is too high.
Prune plants regularly to maintain appropriate size and encourage bushier growth. This is especially important in small window systems where space is limited.
Troubleshooting Common Issues
Algae growth appears as green slime in your containers and tubes. Prevent it by using opaque containers and covering any parts of the system exposed to light. Clean affected parts with a diluted hydrogen peroxide solution.
Root rot develops when roots don’t get enough oxygen. If roots turn brown and slimy instead of white and firm, improve aeration in your system by adding an air stone or adjusting water levels.
Pest problems can still occur even without soil. Inspect plants regularly for aphids, spider mites, or fungus gnats. Treat early infestations with insecticidal soap or neem oil sprays, being careful not to contaminate the nutrient solution.
With these components and maintenance routines in place, your window hydroponic system will provide fresh herbs, greens, and even small vegetables year-round, regardless of outdoor growing conditions.
Conclusion
Wrapping Up Your Window Farm Journey
Creating your own hydroponic window farm opens up a world of year-round growing possibilities right in your home. By following the simple steps outlined in this guide, you’ve learned how to transform an ordinary window space into a productive garden that can yield fresh herbs, leafy greens, and even small vegetables regardless of outdoor conditions.
Remember that successful window hydroponics depends on balancing a few key elements: proper lighting (whether natural or supplemented with grow lights), a reliable water circulation system, and regular monitoring of nutrient levels and pH. Your plants will tell you what they need through their appearance—yellowing leaves might indicate nutrient deficiencies, while drooping could suggest watering issues.
The beauty of window farming lies in its flexibility. Start small with just a few bottles and a handful of lettuce plants, then expand as your confidence grows. Experiment with different plant varieties to discover what thrives in your specific window conditions.
Don’t be discouraged by initial challenges—hydroponics has a learning curve, but the rewards of harvesting your own fresh produce in the middle of winter make the effort worthwhile. Plus, your vertical window farm serves as both a functional garden and a living decoration that brings natural beauty indoors.
As you become more comfortable with basic window hydroponics, you might explore automated systems, different growing mediums, or even connecting multiple window units into a larger indoor farming network. The possibilities are as endless as your imagination and window space allow.
Happy growing!